In order to connect to your server via SSH, if you are using Windows OS, make sure to follow the steps below:
Step I
Download a SSH and telnet client, we would recommend Putty This guide is teaching you how to connect to your server using Putty, but keep in mind that this is not the only tool for this.
Step II
Download your key from the Bunnyshell platform, from Settings -> SSH Keys -> Select the PRIVATE key -> Download.

Make sure to save your key in a place where you will have easy access, as you will have to use it in the next steps.
Step III
Make sure that you have port 22 open on your VM. This can be done from Virtual Machine -> Click on your desired VM -> Security tab -> Firewall -> Click on + to add a new rule -> In Port Range add 22 -> As a source you can select My IP to autofill your current public IP.
If you wish to learn more about firewall rules, give this article a read.

Note: Be aware that you might have to update this rule, the next time you try to connect, as you might have a dynamic IP and therefore the rule will not allow you to connect anymore.
Step IV
Convert your downloaded key into ppk format using Putty Generator by following these steps:
- Open Putty Key Generator (PuTTYgen) and click on Load;
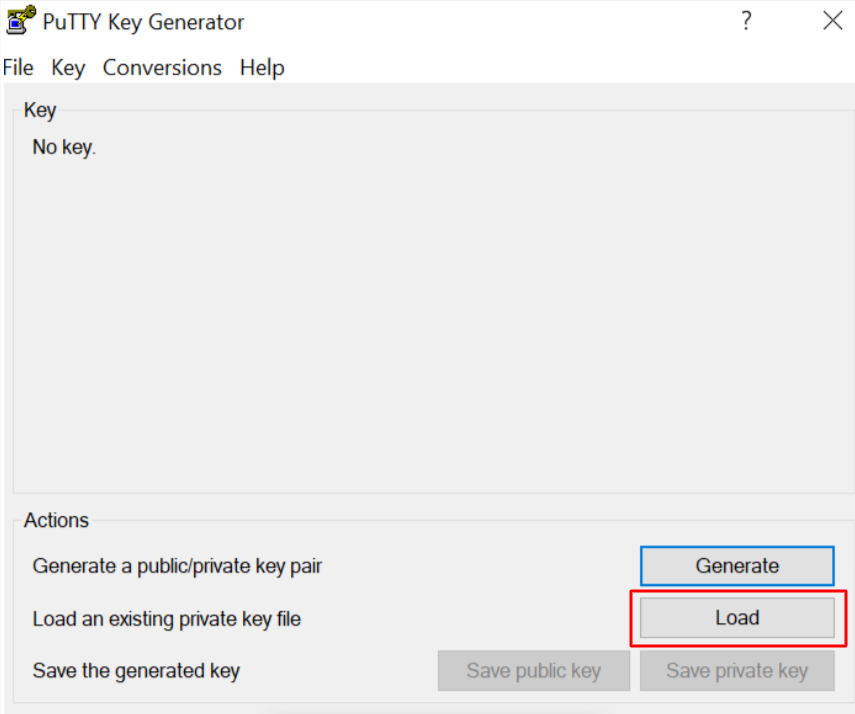
Note: If you cannot find your file, make sure to select All files so your key shows up;

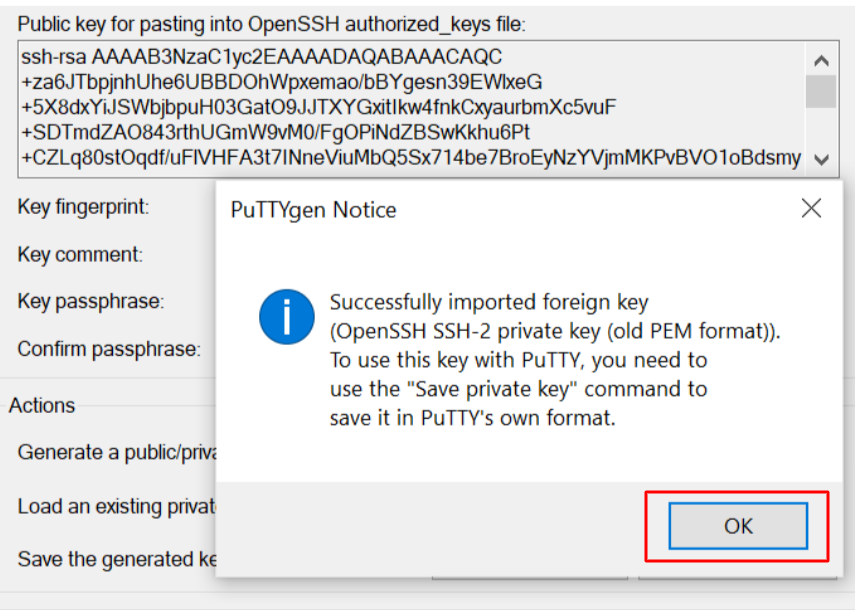
2. Once you have located your key, click on Open and you should receive the following message:
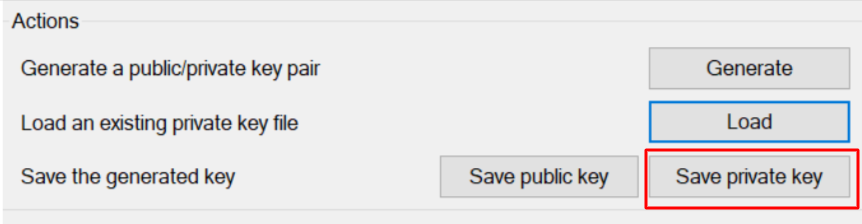
3. Simply save your private key in the new .ppk format
Step V
In order to now connect to your server, you have to:
- Open Putty;
- Find the IP that your VM has, which is visible anywhere in our platform;

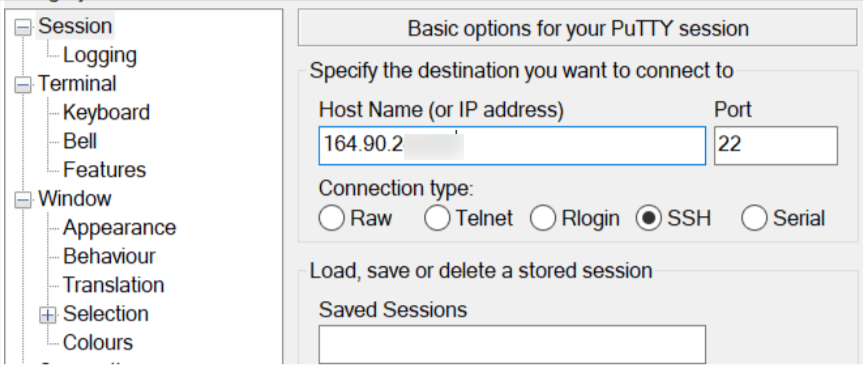
3. Enter the remote server Host Name or IP address under Session;
4. Navigate to Connection > SSH > Auth.
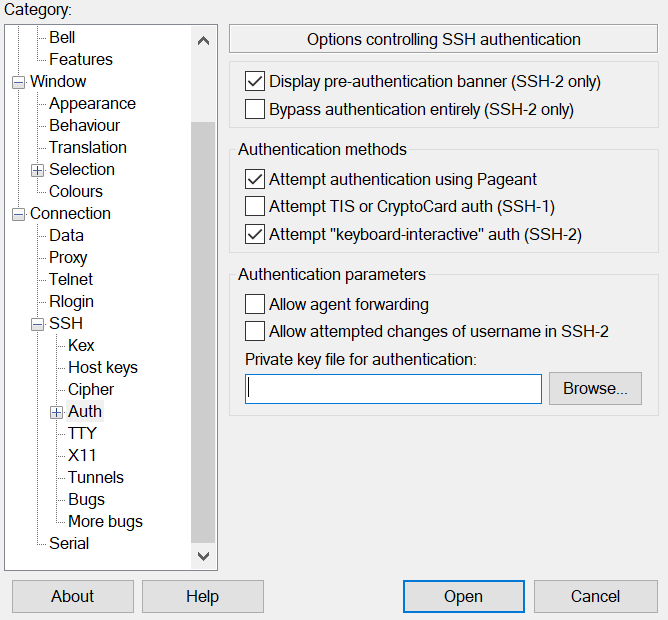
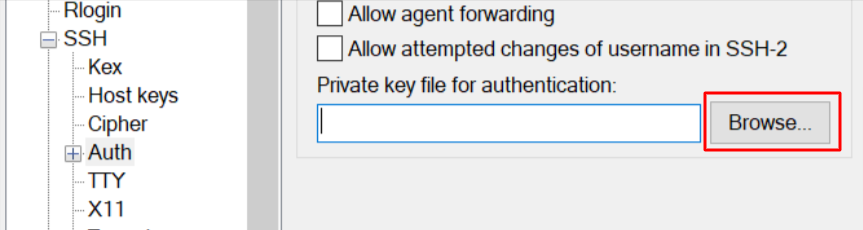
5. Click Browse... under Authentication parameters / Private key file for authentication.
6. Locate the saved private key and click Open.
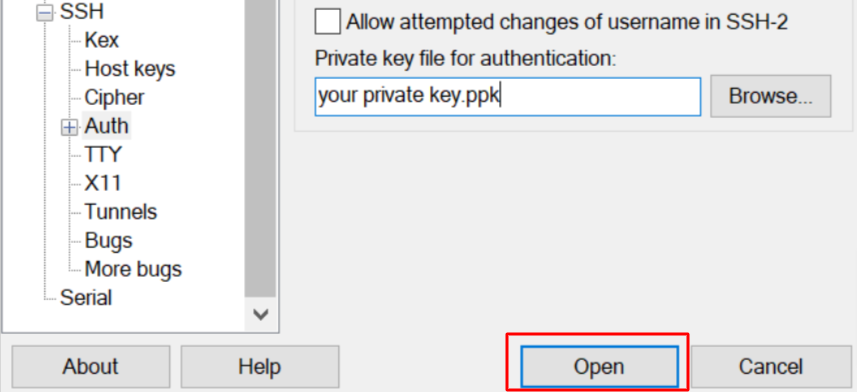
7. Finally, click Open again to log into the remote server with key pair authentication.
Note: Once you get asked to input the username, you will have to enter: bunnyshell